So you’ve got a website idea and are ready to go, but you don’t know how to implement it. I mean, how do you even make a website? And what are some of the other steps required or necessary to develop your website?
In this post, I will cover the steps I take when creating a new WordPress site with HostGator and Namecheap. This is particularly great if you have some new niche idea and want to get it off the ground but don’t know where to start.
Below are the steps you can take to build a full-blown WordPress website on HostGator through Namecheap.
-
In this article hide
Create a Chrome user profile

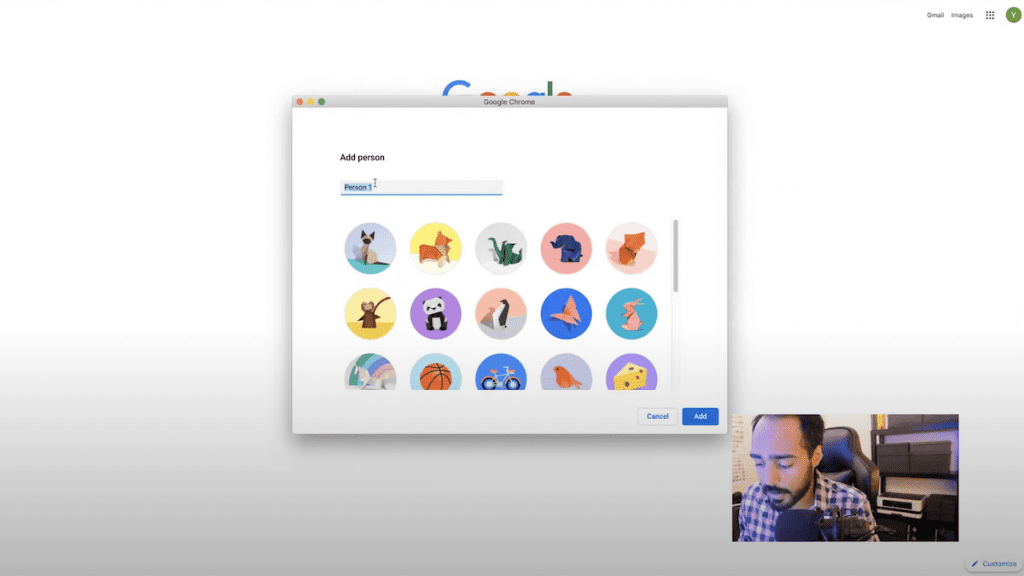
Open up Chrome. The first thing I want to do is create a user profile for that particular browser because I will be saving many passwords, usernames, extensions, and bookmarks, and I want those all to be in one place.
So this is how you create a new user profile in Chrome. Go to this little icon (see video) and click manage people. Then you would click add person. Then type in the name of the brand or the user account you want. This is not your name but the thing that you’re managing. So for this instance, I’m going to create a website called Monolith Mountain Bikes. That’s the name of the brand of the website that I want to create. I will click Add Person, Click Ok, and go through the next steps. Click, Get started.
I will uncheck you to uncheck Maps and a few other options that I don’t want to associate with this account. And check that I do want to sync their account. This will bring all information, like bookmarks and passwords, into the account. And save it for whenever I log in to another computer.
-
Create a new email address
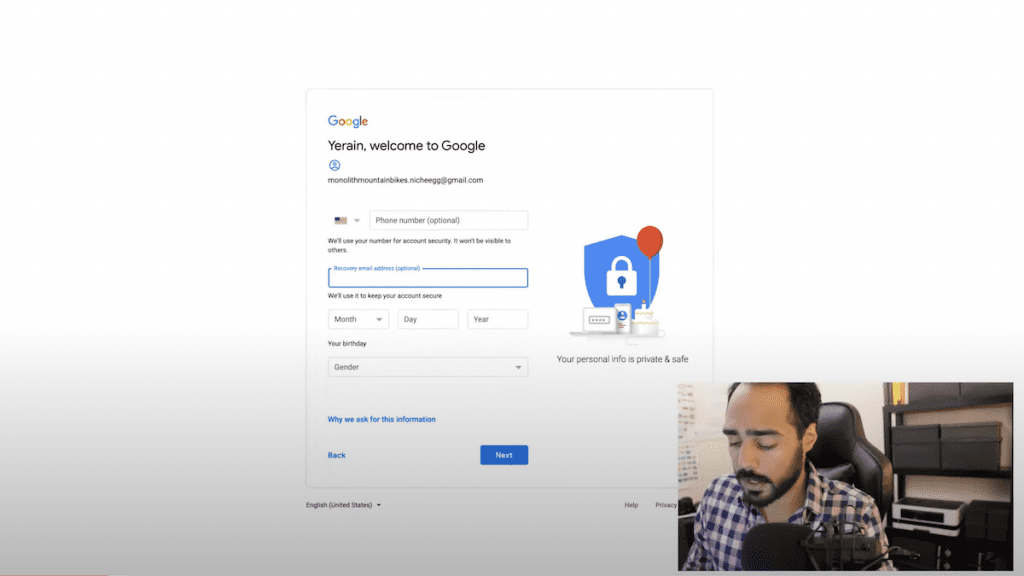
I’m creating a brand new email address for this username. So, I will click Create Account. I’m going to put my first name and my last name. And just put in whatever your store name or your website name is. So if it were cookies.com, you would put cookies in your Gmail account.
Here’s a neat trick I discovered to secure the email address of whatever I want. If you did want to open up a website called cookies.com, you would pull cookies dot and then something else like [email protected] or [email protected]. So, you can use this umbrella brand name for all your accounts and the dot technique to secure your Gmail addresses. In my case, I’m going to do it because I’m sure that monolith mountain bikes at gmail.com are probably taken. Next, choose a password.
In this case, I guess we got a little lucky because it said the phone number is optional, but sometimes you’re going to run into issues where they want to verify your phone number. And that’s fine if your phone number hasn’t been verified with them and your email addresses. But if it has been verified with, like, ten email addresses, it might be a problem.
It will say no. You cannot create a new email address associated with this phone number. But for now, let’s move on. I am going to put a recovery email address and my birthday. I will put nothing for gender because this brand is not a person. And click next.
Okay, great, so now we have an email address we can use for all the accounts we create with this brand. Not only that, but we have a Google user account so that for all those passwords and bookmarks we create, we can keep them all in one container, and we don’t have to muddy up our chrome account.
So we’re ready for the next step; purchasing the domain from a domain registrar.
-
Purchasing your domain
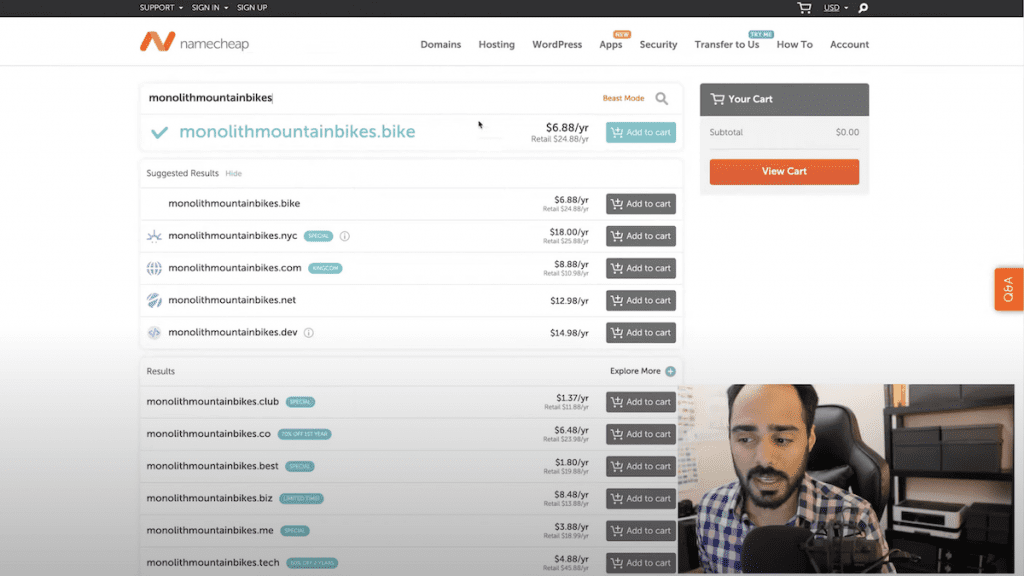
Now we will purchase the domain from a domain registrar. I like to buy all my domains from Namecheap.com. That’s just my preference. I’m used to them, and I like their service, so that’s what I’m going to go for.
So, go to Namecheap.com and search for the domain that you want. (I’ve already verified that this domain was not taken) If you’re buying a domain name and don’t see the .com extension immediately available, you might think that the domain is already taken, But it’s probably not. To see if the .com is taken, add .com to the end of the domain name.
Sometimes it’ll give me a dot NYC, which will be more expensive. This is because they’re pushing a slightly higher premium domain name. After all, you didn’t specify the domain extension.
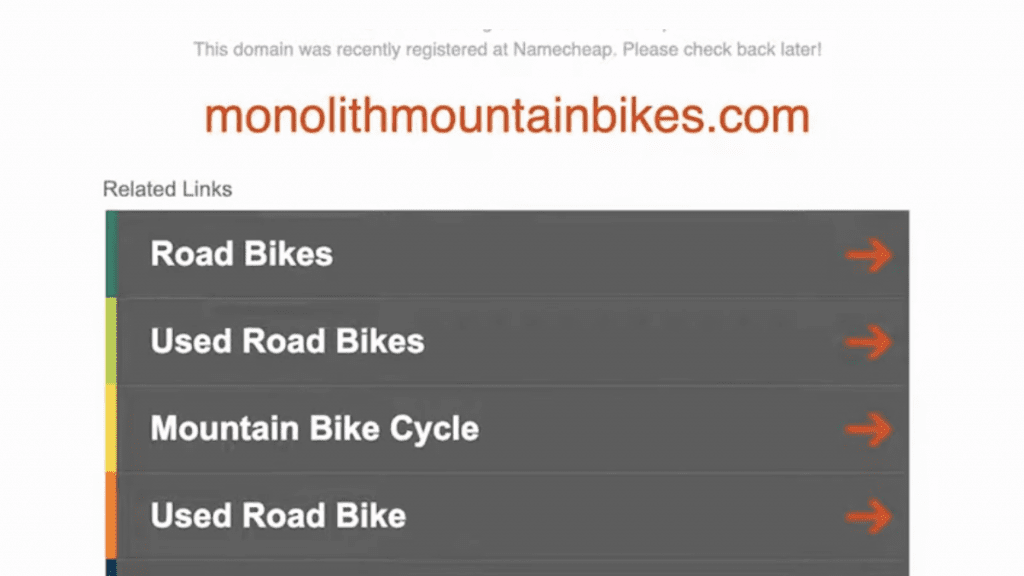
Click Add to cart. Before I purchase this, I want to show you what the domain currently looks like. Search for monmouthmountainbikes.com, and click enter. You’ll see it does not exist. This is what Monolith Mountain Bikes looks like right now.

My internet service provider could not find anything for it. So now I’m going to go ahead and log into my Namecheap account, and I’m going to purchase the domain. Oh, here we go.
Here we see the first instance of how Chrome is trying to help us save some usernames and passwords. I’m going to click Save. Remember that the username and password I just saved are for this user. So if I look at people, there are two users here. If you want more, you can add a person or do the earlier method. This password I just saved for my Namecheap account will not be the password for this account anywhere else. It’s going to be just for this one.
So again, if we bookmark this website and go to our other account, we’re not going to see that bookmark. This bookmark is just for this new brand that we’ve created. I like doing that. It keeps everything really in order.
Ok, now we’re going to click on the domain and buy it. First, check that it has the extension you want. Click Add to cart. Click Confirm. Now it will ask about the payment methods you want to use.
And here’s our total: $9.06 for the first year and $0.18 for the tax. So every year, it’s going to be around $10. So that’s not a bad deal at all. I’m going to click pay now. It’s going to go through a couple of steps. And that’s it.
Now I want to show you what the page looks like.Now we’re going to go through a couple more of those in just a little bit because we have to connect our domain name with our hosting provider. So that’s the next step.
-
Connecting your domain to HostGator
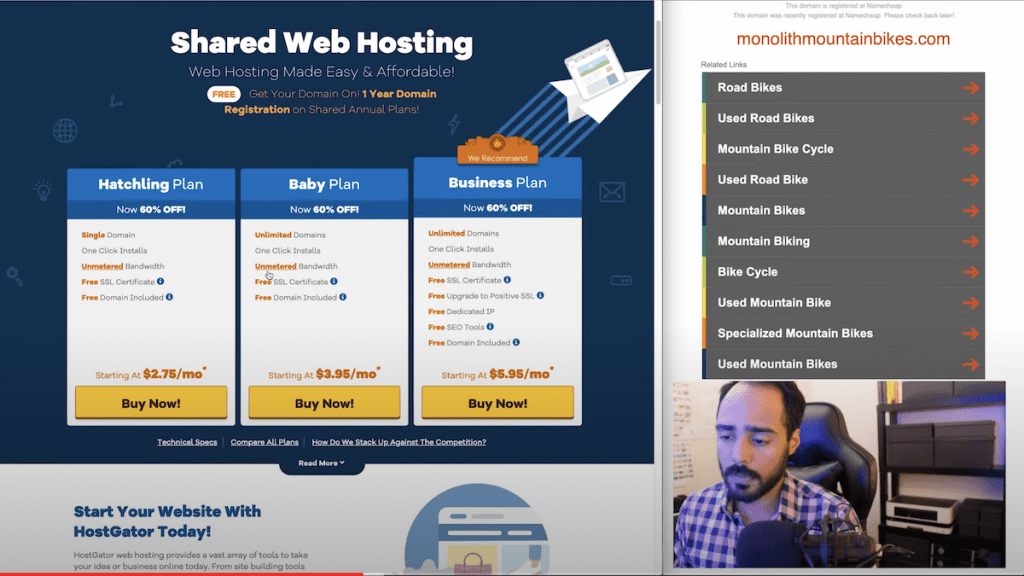
So we just purchased a domain name through Namecheap, and now we have to connect it to our web host. I choose HostGator because I like the pricing. There are tons of others out there. Sitegrounds.com is good, from what I hear. But I don’t go for them because it’s a little pricey, and I already have a HostGator account with the baby plan. (Note: As of 2020, I use SiteGround as my hosting provider)
The Baby Plan allows me to have unlimited websites hosted. I mean, how can you top that? And the price is not bad, either. But, unfortunately, I don’t have an affiliate code to give or any discount or anything like that. But I’m sure someone will hook you up if you Google affiliate code discount HostGator. But for now, let’s push through.
So like I said, I already have a HostGator account, but I’m going to take you through how you would purchase an account. Click Get started. Here are the plans. Why would you want to choose the hatchling plan? The baby plan gives you unlimited domains. They have the business plan, but we don’t need that stuff. So I will choose the baby. Click, buy now.
All right. So here, they want you to register a domain with them, but We already purchased one, so we don’t need to worry about that. Unless you have not, you will enter the domain you’re looking for, and it’ll check if it’s available. And then you would have that domain registered through HostGator, not named cheap. It may make things easier, but it’s not my route. I always buy it from Namecheap.
I’m going to click I already own this domain, and then you would type in the domain you purchased from somewhere else. So I’m going to type in my mounolythmountainbikes.com. I’m going to choose the baby plan. I’m going to pick a username. I picked a security pin. And then, you put in your email address and payment information.
Beware of add-ons! They try to sell you a lot of stuff. Having your website automatically backed up sounds good, but you can do it free. If you have a coupon code, you can put it on this page. It automatically threw us a coupon code here for no reason, which is great.
Okay, once you fill out all the information on this page, check your email address for an email containing the information you need to access your portal.
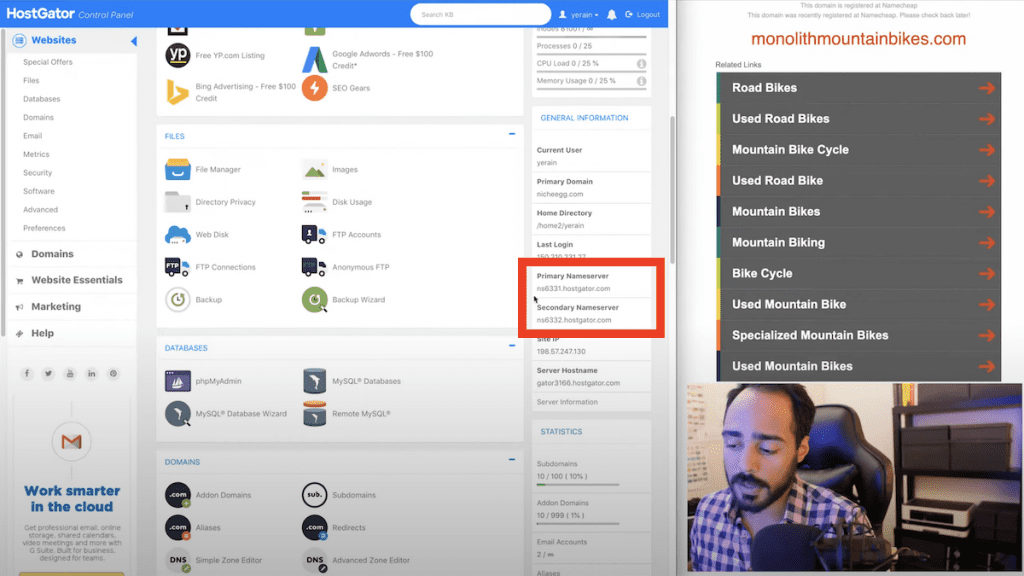
So this is me logging into my portal right now. This is your HostGator account. This is not where you go to control your website. This is where you go to manage your payment and stuff like that. So to access the website, we need to open up the cPanel.The cPanel is where you edit everything. So you should have received two emails from HostGator, one with the information about your portal account and another about your cPanel account.
You can also launch cPanel from your portal. You can click launch cPanel. Ok, so we’re in the cPanel. The first thing I want to do is scroll down to the server name serving our website. We’re going to take that and copy it over to Namecheap.
Go back to Namecheap. Go to your account and click on manage domains. Then where it says name server, click on custom DNS and paste the server names. Don’t forget to click the checkmark.This tells Namecheap that if someone goes to monolythmountianbikes.com instead of going to this park page, I want you to forward that user to this server.
-
Adding the domain to HostGator
Ok, so now that we told Namecheap where we want to send the users when they go to this website, we have to go back to the cPanel and go here, add on domains. We click on, add on domains, and then we tell HostGator,
“Hey, there’s a website that we are routing into our servers, so I want you to be aware of this.“
Monolithmountainbikes.com is the new domain that we want to add to our account. Click here. It’ll auto-populate these sections. By the way, if you don’t add the .com or your extension, it’ll just say this is not a valid domain. I don’t want to create an FTP account right now. So I don’t need to do that and click add domain. It will say (domain) has been added to your account.
Now, let’s look at what the website looks like now that it’s routed to a different service altogether. I’m using kproxy.com, by the way, which is a proxy website. So it’ll show you the website how the world sees it, not just how you are seeing it on your browser or in your geographical region because your website might get cached.
So the site might look static and appear as if no changes were taking place for an entire day, but everyone else sees the changes. But you’re freaking out because you think your website is broken.
At this point, we can close the Namecheap tab. I want to bookmark our cPanel because we will often access that. I want to bookmark our billing portal because it’s very important.
-
Installing WordPress
So. what is the next step now that you added the domain? The next logical step
is creating a WordPress site. Now you could do other CMSs but don’t. Just use WordPress. I can’t tell you the number of times when a friend has come to me and said,“Hey, can you help me out with my website?“
And I go in there, and I can’t do anything because it’s incredibly restrictive.
Now that we’re on the success page, I will click Create a website. And now it’s going to ask, what domain do I want to install this version of WordPress on?
Oh, by the way, do not use any of these add-ons. It is just a cash grab.We’re going to do this right now. One of the features they’re advertising is something you’ll do when you click this button. It’s silly. It’s nonsense. It’s a money grab. Please don’t buy it.
The blog title is the name of our website. The Admin user is yourself. Fill out your first name, last name, and email address. I will use the email address I’ve used for this particular brand account we created. And I’m going to check the terms and conditions and click Install. It’s going to take no more than a couple of seconds. And that’s it!
Remember that this password you will receive is random numbers and letters, and it’ll always be like that for WordPress the first time. After that, you must manually go in there and change it to something coherent you can remember. This information should be emailed to you, so you can go to your email address and see it there if you ever forget.
So as of now, you should have at least three emails with your username and password for your cPanel, your username and password for your HostGator portal, your username and password for your WordPress account, and maybe somewhere down there, the Namecheap account that you created. That one probably won’t have your username and password on it.
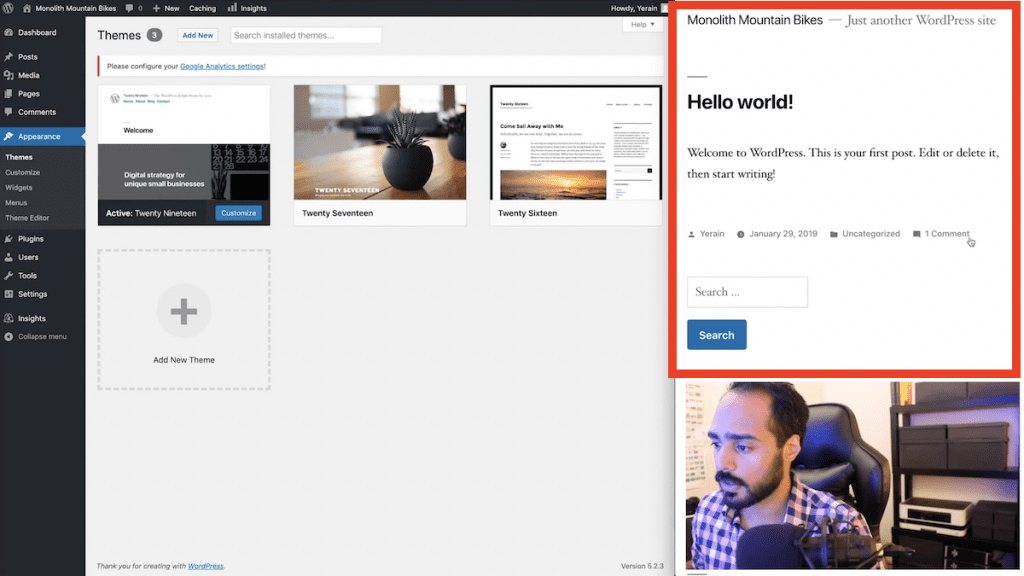
As of now, this is what our website looks like. So now, we can confirm that WordPress is successfully installed on our website on our server.
-
Deleting pre-installed WordPress Plugins
So we are on our dashboard. I’m going to close all these pop-ups and panels. I’m also going to eliminate the coming soon page because I will go into the plugins causing it.
So right now, I’ll delete a bunch of the plugins I know I will not use. You have to deactivate them first. I’m going to check all the deactivated ones and delete them.
OK, great. So now, let’s go to our dashboard, and you can see that this is pretty straightforward. We got rid of those plugins that were bugging us and that we weren’t going to need anyway. And now, finally, we get the final unveiling of our website. There it is.That is the first step of creating this brand account that we will build in the future.

OK, so there we have it. We’re done for now. So, in this video, we:
- Created a new user profile on our Google Chrome browser to store all our data, like passwords and bookmarks.
- Then we created a new email address for the brand we wanted to work with.
- Then we purchased a domain through Namecheap.
- Then we created a HostGator hosting account and purchased a plan to host our website.
- And then, we went back and connected Namecheap to HostGator and vice versa.
- And then finally, we installed WordPress, logged on, and deleted a couple of plugins so we could see what our website looked like.
Of course, this website will have many more things going on, but for now, this is what it is.
Are you a visual learner? Check out my video below, titled “How to Create a Word Press Website (HostGator & NameCheap) Free Tutorial for Web Development and SEO” from my YouTube channel, as I show you all this firsthand.
Frequently asked questions (FAQ)
Do you still have questions? Below are some of the most commonly asked questions about making a WordPress website.
Can I build a WordPress site myself?
User-Friendly. Even if you’re not tech-savvy, you can get a WordPress site up and operate in about an hour. A website address (domain name) and web hosting are all that is required.
Is WordPress’s website free?
WordPress sites may be free or for a fee (like WordPress plugins and WordPress themes). However, WordPress software (the “core” of WordPress) will always be open-source and free.
Is it possible for a novice to create a website?
It’s far less difficult than you imagine to figure out how to construct your website. It’s feasible and likely that you can make a website without spending a dime or learning how to code. It’s real, and I’ll show you how to set up a website in no more than 6 simple steps right now: Select a Website Builder to start creating your site.
Conclusion
Okay, so that concludes this article. What do you think? Let me know in the comments below (I read and reply to every comment). If you found this article helpful, check out my full blog and be sure to subscribe to my YouTube channel. Thanks for reading!


