Want to build free WordPress websites? I’ll show you one of my favorite web design and development tools in this article. It’s an app called Local by Flywheel. This tool lets you create unlimited WordPress websites. This tool can turn your computer or laptop into a server. This is a great way to learn database management or PHP without having to manage a live website. You can do everything on your local machine.
And the best part about this whole thing is that it’s free. So you don’t have to pay a single cent to use Local, and you can make unlimited websites.
Here is how to use Local to start creating virtually unlimited websites!
Launching local
When you first launch Local, you will have to go through an installation process. As soon as you finish the installation, it will bring you to the main dashboard.
So the first thing is you can log in. But a great thing about Local is that you don’t need to create an account or anything. You can just set it up and just get started. They don’t need any more information from you. You just create your website, and you’re good to go.
Now, since I haven’t created an account, I can’t tell you what’s in this actual tab, but let’s move forward.
Local’s connect tab
Here you can connect your website to Flywheels Hosting. I believe they use WP Engine, but it seems like you can ask them to connect to another host. Again, I haven’t done that, but I’m just here to show you what’s on this dashboard.
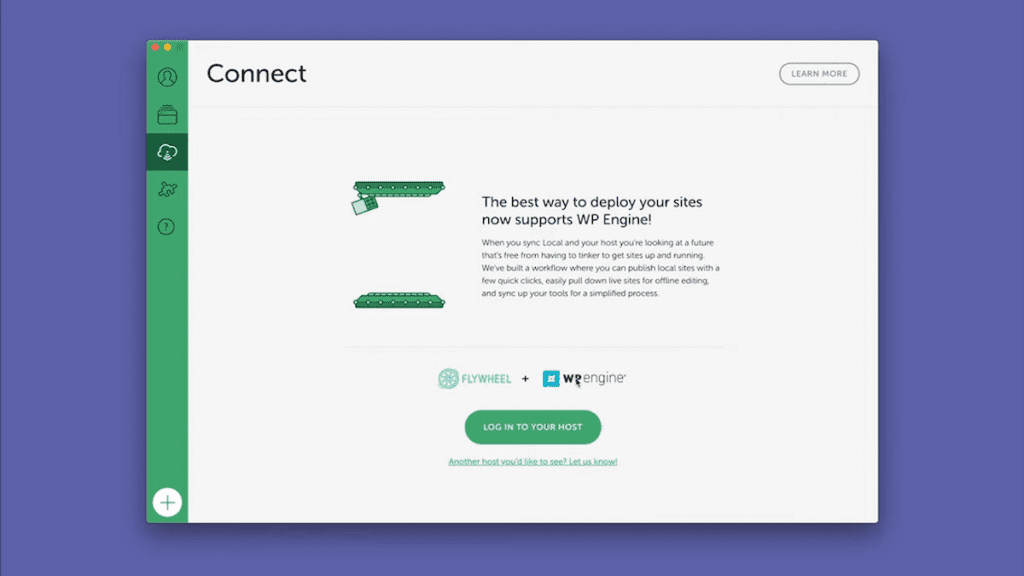
So before you download the application, you can take a look at what’s inside. If you click the Learn More button, it’ll take you to this page, where you can learn how to connect Flywheel with another hosting account.
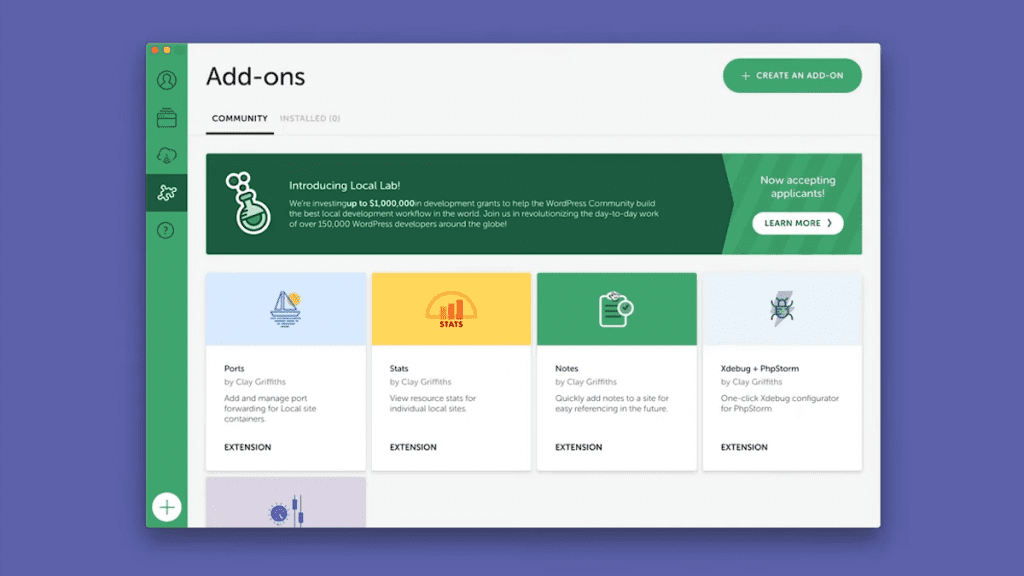
Local’s add-ons tab
I don’t know what add-ons are all about. I’ve never installed an add-on because I just don’t need one. It does what I wanted to do, but I’m sure some of these add ons are great.
Local’s get help tab
If you click on the question mark, it will take you to the Get Help tab. So this is part of the community page if you’re having any issues. It’ll take you to the community page. It’s like a form.
They also have a tab for WP Engine support if you are using them as your host. That’s all that’s on this sidebar.
Preferences – appearance and behavior
Let’s look at the top bar, click on preferences, and focus on appearance and behavior. Here, you can change the look from light to dark. Then, click apply, and they have a dark mode. It’s neat, but I prefer light mode. I believe Auto is part of the new feature in Mac OS where everything starts.
You can find the auto feature in the general settings of Mac, where it’ll automatically change based on the time of day. So right now, I have it set to auto, so now it is light, and later tonight, it’ll turn dark.
Preferences – new site defaults
You can set up the defaults for every new site you create on the New site defaults section. There isn’t much on this tab. You can change the default email address to which you’re going to connect the website. You can also change the directories.
This is in reference to the domain suffix, the TLD (top-level domain, e.g., .com, .org, .net, .local, etc.) So, for instance, you can set a website’s directory to .web. You could also change this when you’re building the website, but you could set this to every new website you create. I’m going to leave that as it is.
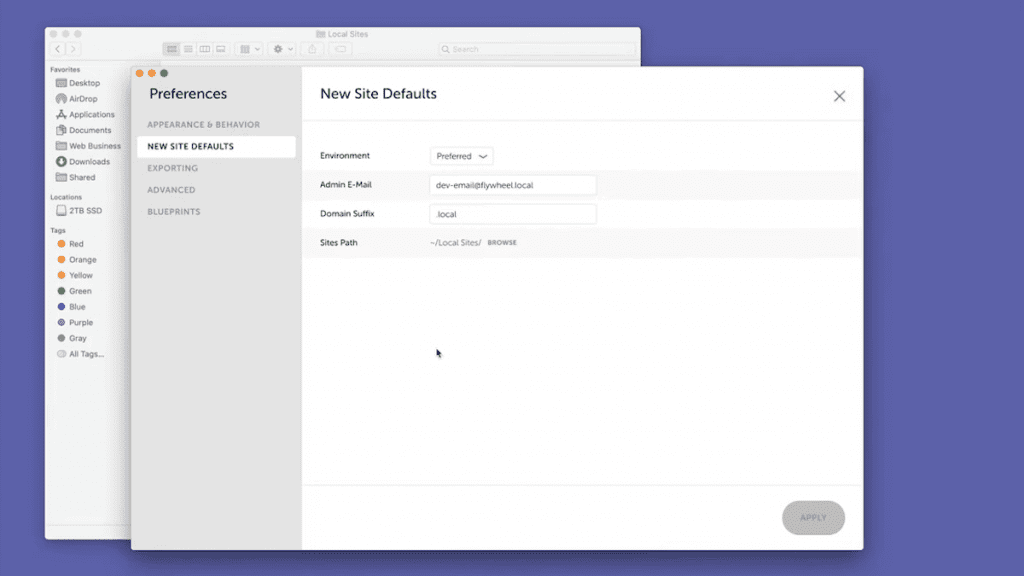
Site path is also important because this is where the websites will be saved. If we click “browse,” we see the four websites I showed you.
Let’s take a look at where Local saved our files. So if I go over here to my Mac HD > users > user account > local site. Local created a new folder in the user folder called “local sites.” And that’s where it’s storing your websites. So if you want to change that, this is where you can do it right there, browse and pick the folder, and that’s it.
Preferences – exporting
Just click apply our exporting. Not much here. I think it’s just the extension of the zipped file. In my experience, I’ve never had to change it. Zip is perfectly fine.
Preferences – advanced router mode
If your Local website has some issues, it will automatically change it to .local hosts instead of .domain. I’m not 100% what that entails. I just know that it does that. Sometimes it sees a few hiccups and says, Look, we switched it up. This is just for when you’re having issues. But I have had that happen, and it did switch up automatically to this, which gave me some other issues but let’s not go down that rabbit hole. If this is a fresh install, you should be fine.
Preferences – Show developer mode
If you want to debug and stuff like that, you can turn that on.
Preferences – blueprints
This is one of my favorite parts of this application. So what this allows you to do is create the perfect WordPress website that has all the plugins you want. Then, you can save that site as a blueprint. And then you can create websites on the fly real quick using that same exact blueprint. It’s pretty awesome.
How to create a new WordPress website with Local
So now I’m going to click “add local site” to show you what it looks like when you create a new website.
What’s your site’s name?
This is where you add the name of your website. You can click continue, or you can click advanced options. I’m just going to click continue.
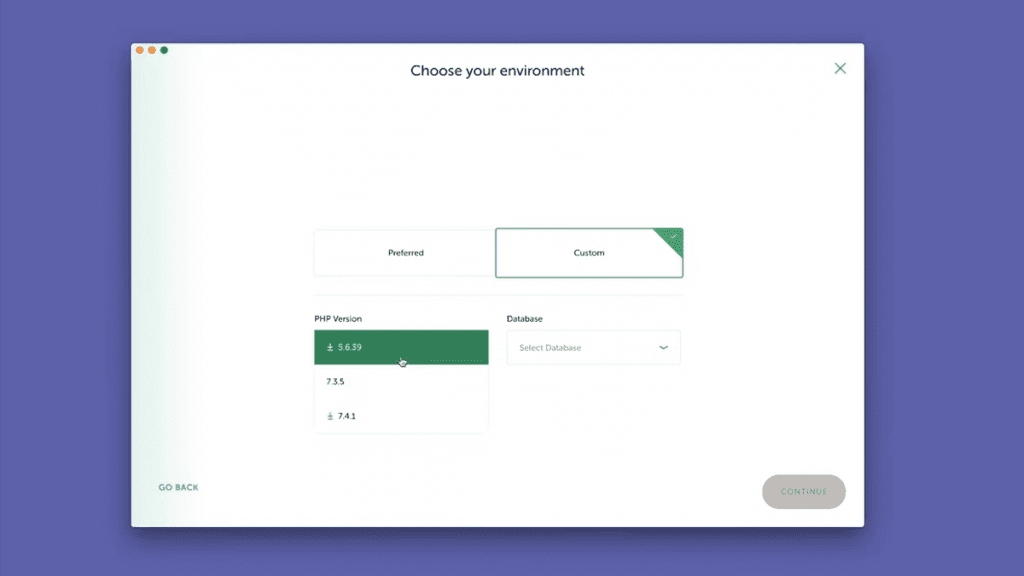
Choose your environment
On the Choose your environment page, you can choose your server settings; Preferred or Custom. Preferred is the default setting. But you can choose custom if you’re going to select your PHP version, or you can change the database setting. So I will select Preferred, go back and click preferred and continue.
Setup WordPress
Now we get to choose the username, password, and email address that you want to be associated with this WordPress account for it to log in properly.
Now, I’m going to leave this email address just like it is because I want to show you something else that’s cool about Local. And I think you’re going to like this because we can access this email address with Local. We didn’t create a new email account, but we will have an email.
For the question, “Is this a WordPress multi-site so you can choose?” choose Yes only if you have a subdirectory or a subdomain. For example, if you intend to make a subdomain like a shop.website.com. I don’t, so I’m going to click no. And click Add site. It will then install all the necessary files onto our website.
Next, your computer will prompt you to type in your password for your computer (not for your WordPress account). There it is. It’s done.
How to access your website
To start your site, you need to click Start Site. You can have multiple sites running at the same time. So if I click on this one and I click start now, we have two sites running.
At this point, you’re running a server on your local machine. So if you take this domain and type it into your browser, you will see your website. This website only lives on your local machine, but you can use this on any browser to access your Web site. We’ll get back to that in just a second.
Accessing the database
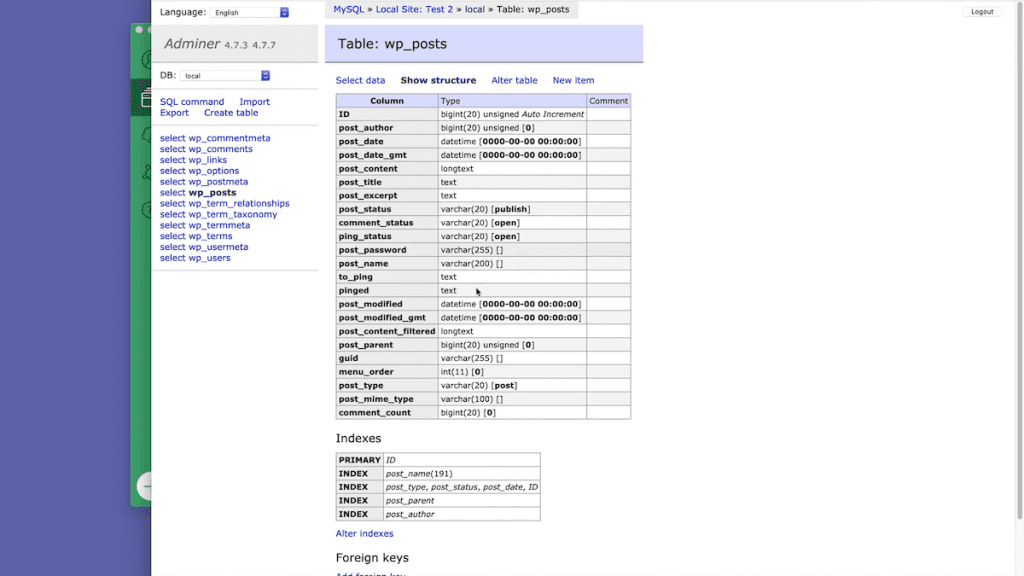
You can access your database by clicking admirer. Here’s your MySQL database for your WordPress website. Here, you can edit anything. All of the information on your WordPress database is right here. How awesome is that? And like I said earlier, this is awesome if you’re learning about database management because you can go here, create a test Web site and start messing with primary keys and database stuff.
You can also download a program called Sequel Pro, but I’ve never used it, so I can’t comment on that.
SSL certificates
If we go over to SSL, you can enable a temporary SSL certificate. However, I have not had it work for me. It does not get rid of the lock for me, but when I try it, it does not work.
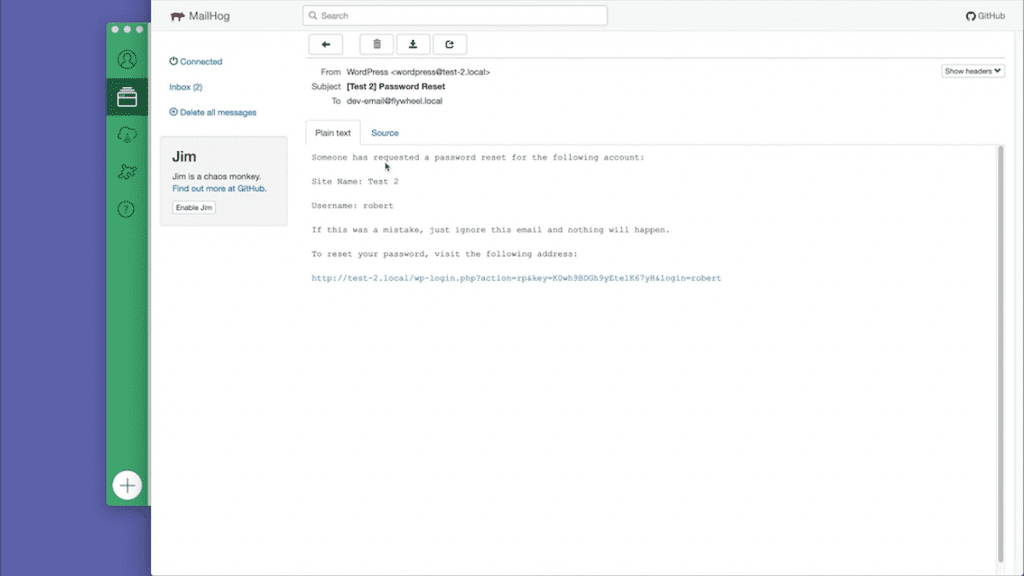
Accessing your MailHog email
To access your email, click MailHog. It’s a live email that you can use for anything. For example, I will show you how it will send me an email to reset my website password. On the admin page, go to forgot password and open up MailHog. And here’s a new email. And now you can change that password.
Accessing your Local WordPress website
To log into your new website, just click on Admin or Visit website and add /admin at the end. It will then prompt you to type in your username and password. And that’s it! Welcome to your new website.
How awesome and easy was that? We created a WordPress website on our local machine, and we can now edit. And it’s live. So if I go to plugins and click Add new, I can start adding plugins like it’s on a real server, like it’s on Sitegrounds or HostGator or GoDaddy. It doesn’t know the difference. It’s a real website as far as WordPress is concerned. You can even download plugins live.
Sharing your website on the internet
The ability to share your Local site on the internet is one of my favorite features of Local. You can take this website that only lives on your computer and share it with others. Hover to the bottom of your Local window, click on the live link button towards the bottom of the window and click enable. It will create a link that you can use to visit the website in real-time.
This feature is fantastic because what you can do is you can start working on your local machine for a client. You can create their Website, and then you can have them look at what you’ve done so far before you even upload it to their server. How cool is that?
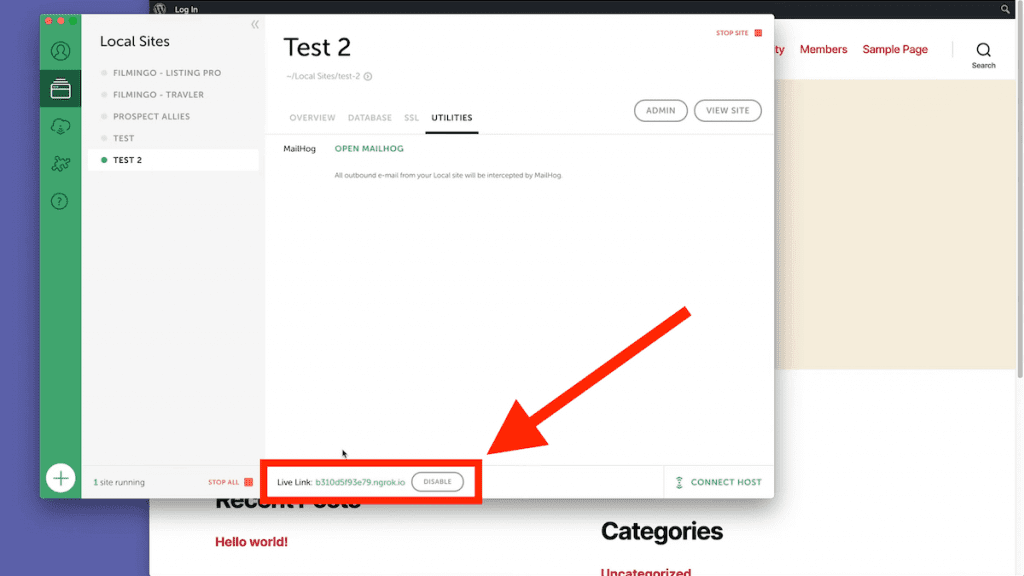
The link expires after a certain amount of time. I know it does not stay live for more than 24 hours. But if the link dies, all you have to do is disable it and enable it again. It will create a new link for you to share with whoever you want to show your website to.
Are you a visual learner? Check out my video below, titled “Local by Flywheel Full Review & Tutorial – Build Unlimited WordPress Websites Offline for Free! ” from my YouTube channel, as I show you all this firsthand.
Frequently asked questions (FAQ)
Do you still have questions? Below are some of the most commonly asked questions about Local.
Is local by flywheel free?
Yes. Local by Flywheel is a free local development environment that makes WordPress developers’ and designers’ lives easier.
Is local by flywheel only for WordPress?
Yes. Local only works with WordPress websites. It enables you to install WordPress websites on your computer with a few clicks rather than on an internet hosting server.
Is local WordPress safe?
Yes. A local WordPress development environment provides a secure area in which to make changes without interfering with your website. You may test themes and plugins in your environment, update websites securely, and provide good performance at a reasonable cost.
Conclusion
Okay, so that concludes this article. What do you think? Let me know in the comments below (I read and reply to every comment). If you found this article helpful, check out my full blog and be sure to subscribe to my YouTube channel. Thanks for reading!


